Adding Drivers
- The first is essentially a person added as an item in a list of drivers that can be assigned to trips. These people have no access to the system and cannot log in. Administrators use this list simply to assign drivers to trips much like they assign vehicles.
- The second type of driver is the Driver user role. These users are able to log into the system to view their assigned trips and enter driver transactions, such as vehicle mileage and purchases. An important thing to remember with the Driver user role is that they are NOT able to submit new trip requests into the system. Additionally, once a user is added with the Driver user role, their user role cannot be changed to another user role in TripDirect. *Note: If a user will need to submit trip requests as well as act as a driver on trips, then they should be given the user role of either Requester, Site Administrator, or Administrator and then also be added to the drivers list.
You can add both kinds of Drivers with the instructions below.
How to Add Drivers to the Driver List
- Click on the Drivers link under Information Analysis.
- Click on Add New Driver.
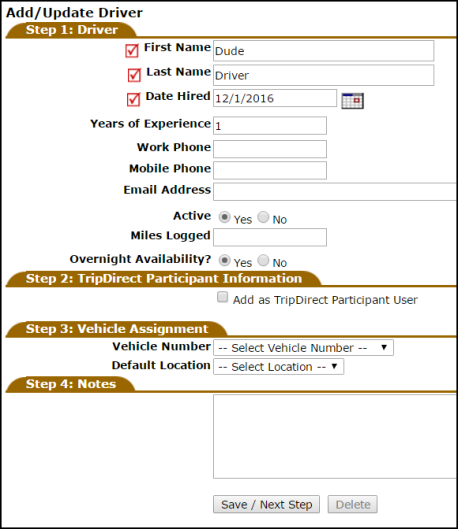
Add/Update Driver
Step 1: Driver
- Enter the Driver's First Name, Last Name, and Date Hired.
- Enter any additional information on the driver in the fields available.
Step 2: TripDirect Participant Information
- Leave the Add as TripDirect Participant User box unchecked to add this person to the Drivers list but not give them access to log into the system.
- Only check Add as TripDirect Participant User if you want them to be able to log in as a Driver. This adds them as a user in the Driver role and will prevent them from submitting trip requests.
Step 3: Vehicle Assignment
- If applicable, select the Driver's assigned Vehicle Number and their Default Location.
Step 4: Notes
- Enter any Notes if necessary.
- Click Save/Next Step.
Add/Update Driver Shift
Step 5: Work Hours
Here you can create multiple shifts for your drivers including different wages for different shift times.
- Enter the Hourly Wage for this driver.
- Enter the Shift Start and End Times and check the available Days of the Week. *Note: If you want the driver to have completely open availability, you can check off all days of the week, and enter 12:00 AM for Shift Start Time and 12:00 AM for Shift End Time.
- Select the Labor Type.
- Click Save & Add Another. Repeat the steps to cover all shift options this driver is available for (Weekdays, Nights, Weekends).
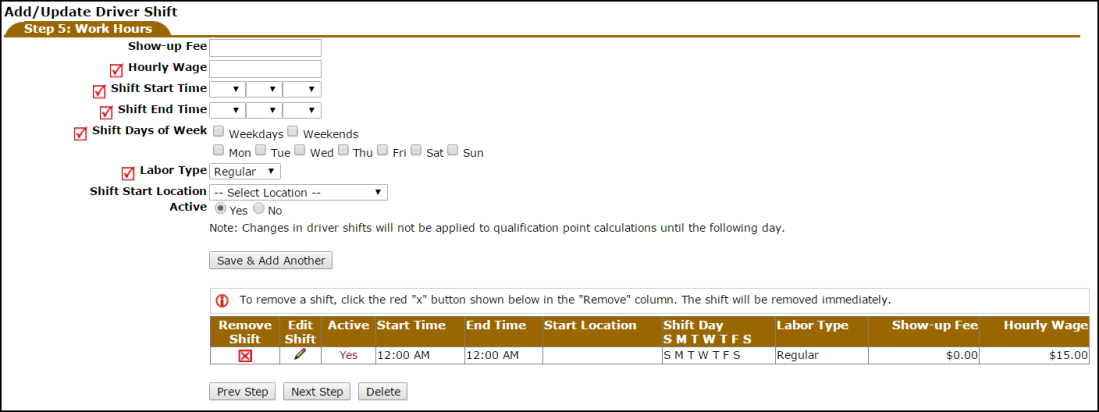
- Click Next Step once all shifts have been added.
Add/Update Driver Certifications
Step 6: Driver Certification
- Select the Driver Certification from the drop down list that this driver has obtained and enter the Expiry Date. Click here for more information about Driver Certifications.
- Click Save & Add Another and repeat the steps to add all certifications for this driver.
